INSTALL WINDOW 7 OS USING VIRTUAL BOX
STEP 1 Open vitual box and create new
STEP 2 Put name and next and create until it finish creating
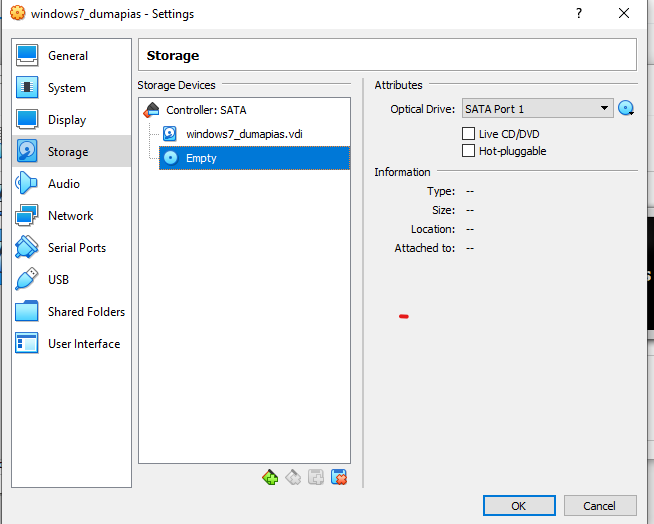
STEP 3 After creating, click settings
STEP 4 Open storage
STEP 6 And choose a file disk
STEP 8 Click start
STEP 9:Choose your Windows Setup options. Once Windows Setup loads, you'll be presented with a window. Use the drop-down menus to select your preferred language, keyboard type, and time/currency format, then click Next in the lower-right corner.
STEP 10:Click the Install Now button. It's the blue button in the center of the screen.
STEP 12:Accept the License Terms. Read over the Microsoft Software License Terms. Then click the checkbox next to I accept the license terms, and click Next in the lower-right corner.
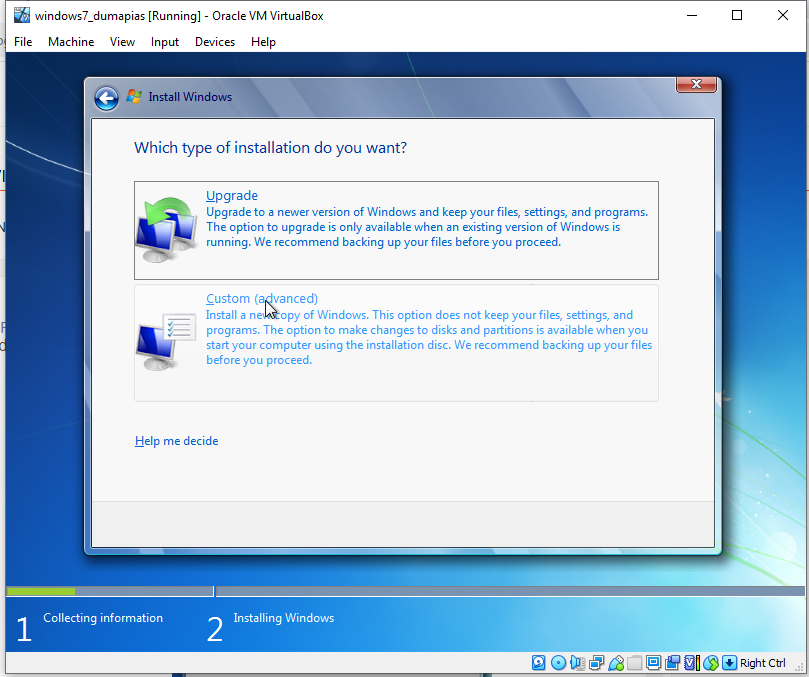
STEP 13:Select the Custom installation. This option allows you to do a clean install of Windows 7. This will erase all your files on the installation drive.
- If you do not want to erase all your files, select Upgrade instead. This option requires an existing Windows installation. You can only upgrade from one Windows edition to another. For example, if you have Windows Vista Home Basic Edition, you can only upgrade to Windows 7 Home Basic Edition. You would not be able to upgrade to Windows 7 Home Premium.
STEP 14:Select a hard drive and partition you want to install Windows on. A hard drive is a physical part of your computer that stores data, and partitions "divide" hard drives into separate sections. Click the hard drive or partition you want to install Windows 7 on.


Comments
Post a Comment